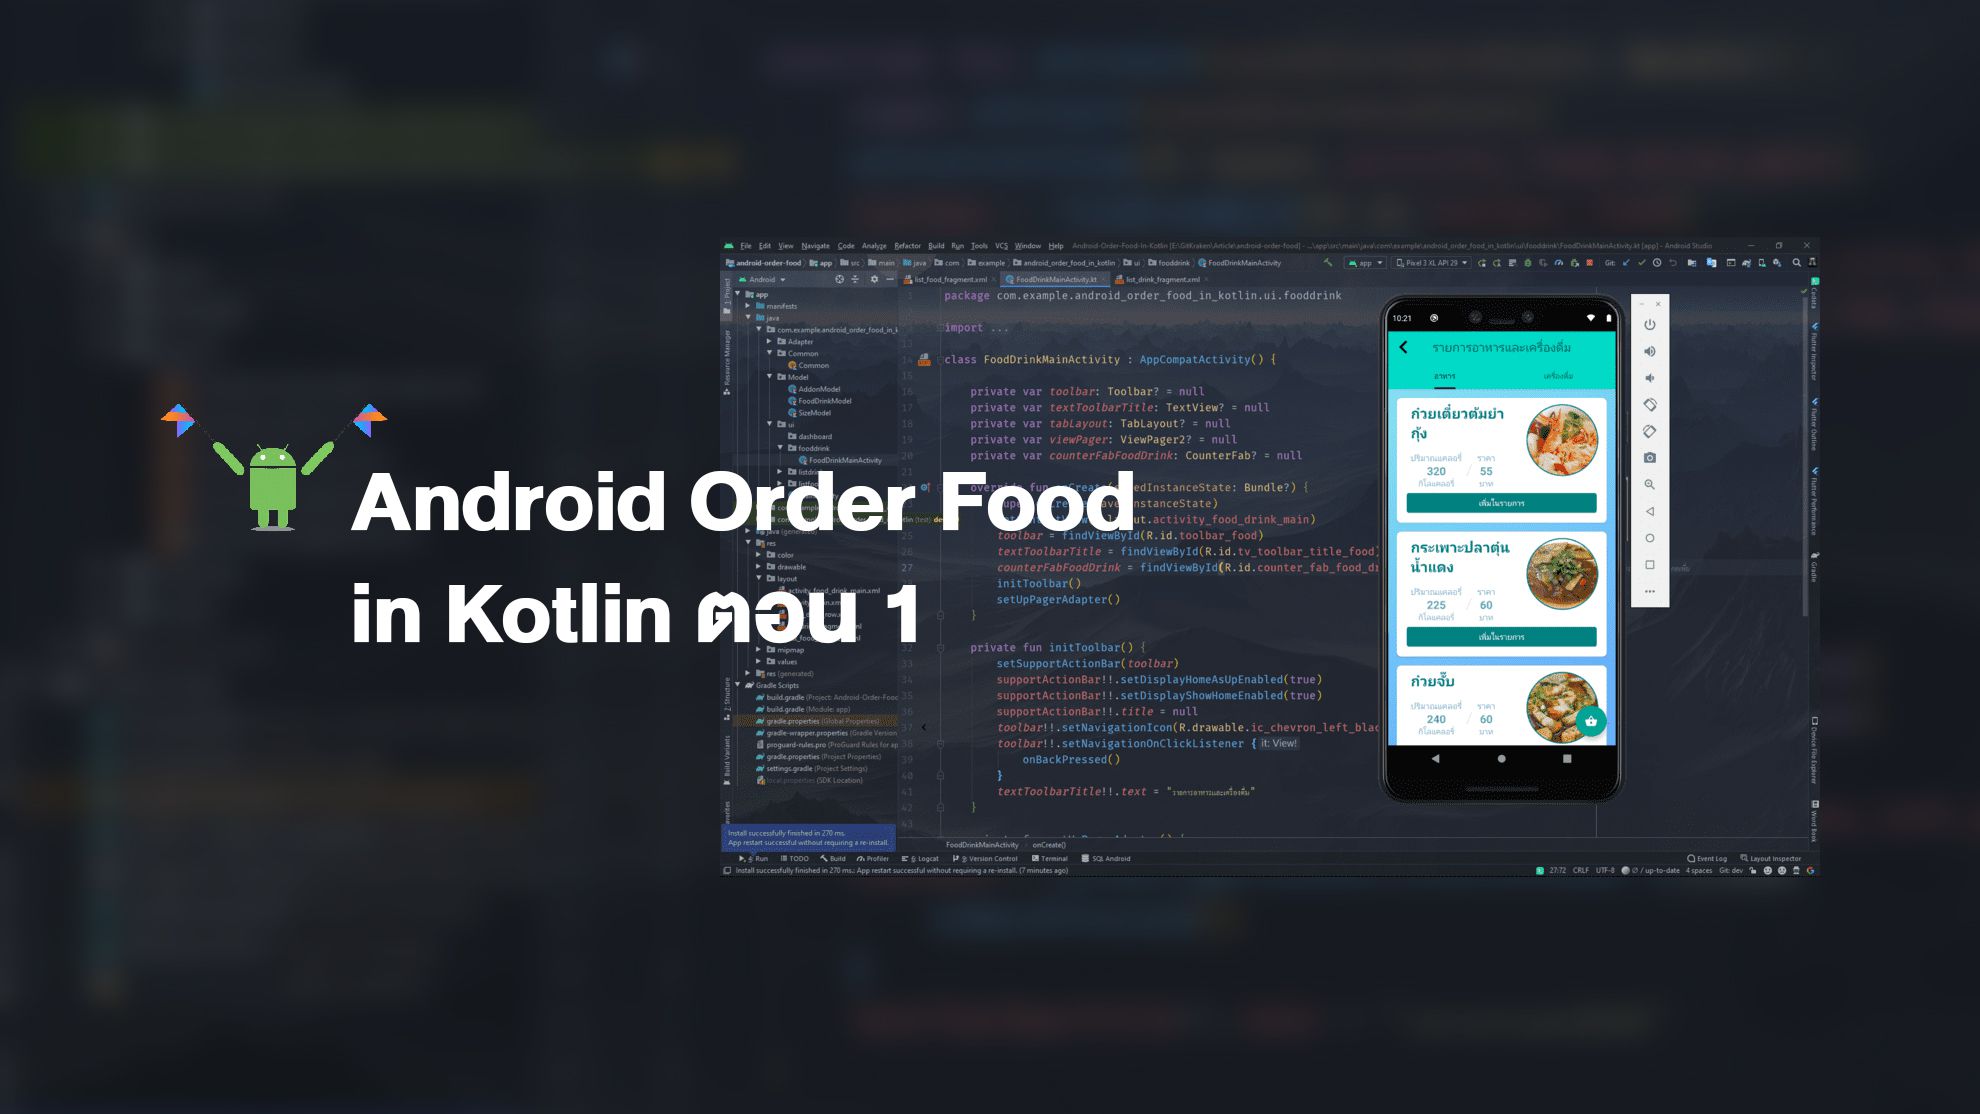
ทำระบบสั่งอาหารบนAndroid เพิ่มยอดขาย
ในปัจจุบันถึงแม้จะมีบริการรับส่งอาหาร Delivery อยู่มากมายหลายต่อหลายเจ้าให้เลือกใช้บริการ แต่จะดีแค่ไหน ถ้าหากเราสามารถสร้างระบบสั่งอาหาร Delivery ขึ้นมาได้ด้วยตัวเอง เพื่อใช้กับร้านอาหารของเราเอง ซึ่งหากใครสนใจจะทำก็มาปรึกษา หรือมาจ้างพวกเรา Twin Synergy ได้นะครับ
ในบทความนี้ผมจะมาแชร์เรื่องการทำระบบ Food Order บน Android โดยจะใช้ภาษา kotlin ในการเขียน และใช้ Cloud Firestore ของ Firebase เป็นฐานข้อมูล
เนื่องจากวิธีการถือว่าค่อนข้างเยอะ เราเลยจะแยกออกเป็นหลาย ๆ ตอน หากใครสนใจก็อย่าเพิ่งปิดหน้านี้หนีไป ลองมาดูวิธีการกัน
ในตอน 1 นี้ จะมาสร้างหน้า Dashboard กับ หน้ารายการอาหารและเครื่องดื่มกันครับ
เริ่มต้นสร้าง Application
- เมื่อจะเริ่มพัฒนาแอปฯ บนระบบแอนดรอยด์ อันดับแรกคุณต้องสร้างโปรเจ็ดใหม่ใน Android Studio ดังนั้นให้คุณรัน android Studio ขึ้นมากับหน้าจอ Welcome to Android Studio

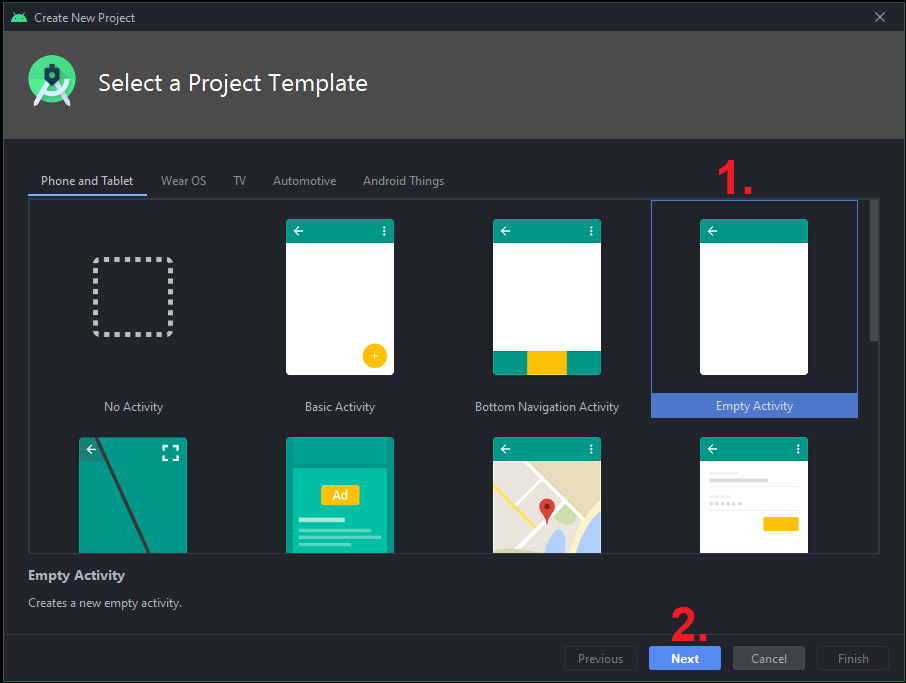
2. คลิก Start a new Android Studio project จะปรากฏหน้า Create New Project
ขั้นตอนที่ 1 คลิกที่ Empty Activity
ขั้นตอนที่ 2 คลิก Next
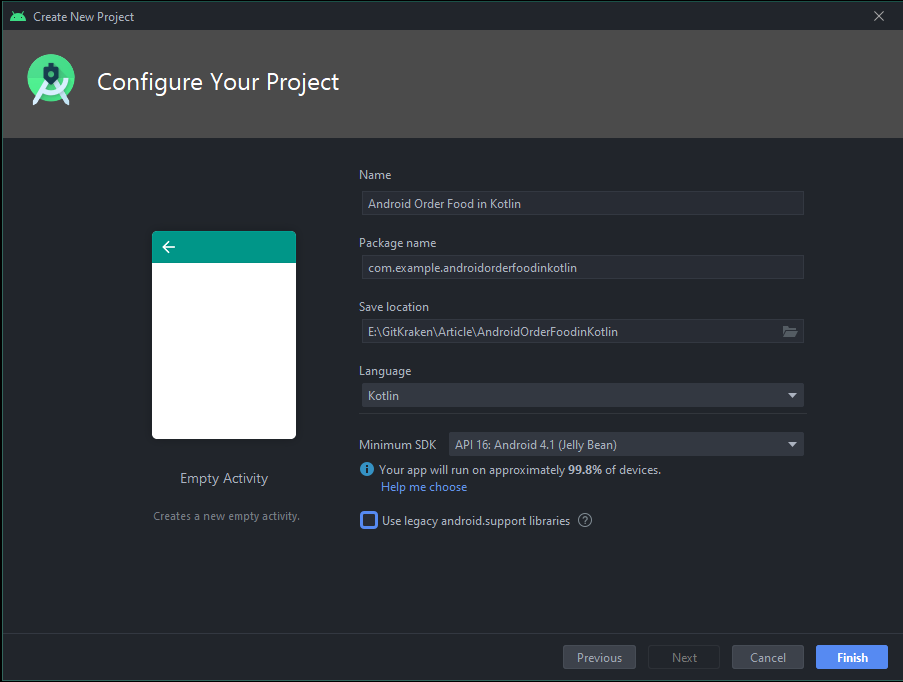
3. ตั้งชื่อ โปรเจค และ เลือก ภาษาในการเขียน เป็น kotlin แล้วคลิก Finish
สิ่งที่ต้องติดตั้ง
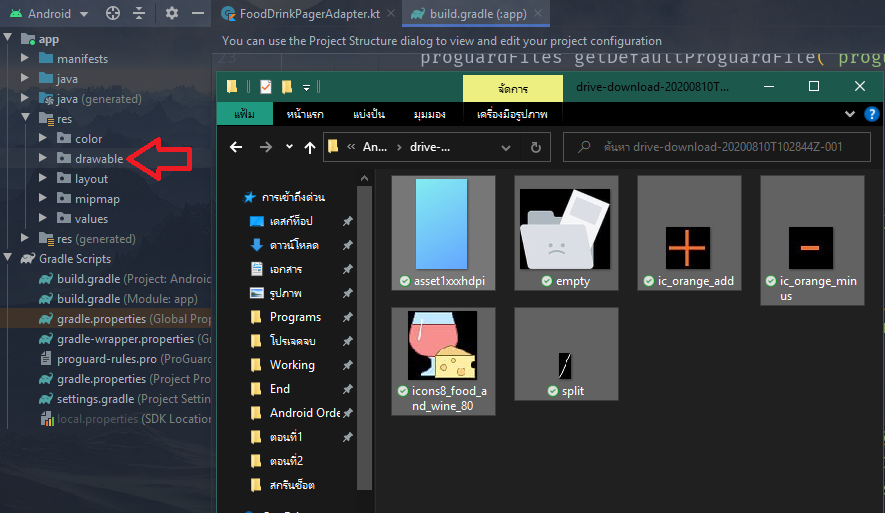
หากต้องการภาพที่ใช้ในการทดสอบระบบเบื้องต้น สามารถโหลได้ที่นี่ URL: https://drive.google.com/drive/folders/0B08PZSOd4UmOOXJjaGVESFg0Skk
แล้วทำการวางภาพทั้งหมดลงใน folder ที่ app->res->drawable ดังภาพตัวอย่าง:
library ที่ต้องติดตั้ง คัดลอกไปวางที่ build.gradle(Module: app)
//CircleImageView
implementation 'de.hdodenhof:circleimageview:3.1.0'

//CounterFab
implementation 'com.github.andremion:counterfab:1.2.2'

//viewpager2
implementation "androidx.viewpager2:viewpager2:1.0.0"
เปิดไฟล์ colors.xml นี้คือ code สี ที่เราจะใช้ในการทำหน้า Dashboard และ หน้ารายการอาหารและเครื่องดื่ม
//colors.xml
<resources>
    <color name="colorPrimary">#03DAC6</color>
    <color name="colorPrimaryDark">#000000</color>
    <color name="colorAccent">#00a294</color>
    <color name="colorTeal">#008081</color>
    <color name="colorRed">#FF0000</color>
    <color name="colorDivider">#EEEEEE</color>
    <color name="colorGray12">#888888</color>
    <color name="colorWhite2">#ccffffff</color>
    <color name="colorGray1A">#1affffff</color>
    <color name="colorWhite">#ffffff</color>
    <color name="colorBlack">#000000</color>
    <color name="colorDarkGreen">#0E6251</color>
</resources>
เปิดไฟล์ strings.xml
//strings.xml
<resources>
    <string name="app_name">Android-Order-Food-In-Kotlin</string>
    <!--food_drink Screen-->
    <string name="no_data">ไม่มีข้อมูล</string>
    <string name="no_data_cal">"??"</string>
    <string name="price">ราคา</string>
    <string name="todo">TODO</string>
    <string name="baht">บาท</string>
    <string name="kilo_calories">กิโลแคลอรี่</string>
    <string name="calorie_content">ปริมาณแคลอรี่</string>
    <string name="food_and_drink">อาหารและเครื่องดื่ม</string>
    <string name="add_to_list">เพิ่มในรายการ</string>
    <string name="added">เพิ่มแล้ว</string>
    <!--food_drink Screen End-->
</resources>
เริ่มเขียนแอปฯ
นั้นเราจะมาเริ่มสร้างหน้า Dashboard กันก่อน
เราจะไปสร้าง btn_bg.xml ที่ app->res->drawable โดย btn_bg.xml ตัวนี้ คือ ลูกเล่นเมื่อผู้ใช้งานกด CardView
//btn_bg.xml
<?xml version="1.0" encoding="utf-8"?>
<selector xmlns:android="http://schemas.android.com/apk/res/android">
<item android:state_pressed="true">
<shape>
<stroke android:width="2dp"
android:color="@color/colorGray12" />
<solid android:color="@color/colorWhite2"/>
<corners android:radius="15dp" />
</shape>
</item>
<item>
<shape>
<stroke android:width="2dp"
android:color="@color/colorGray1A" />
<solid android:color="@color/colorWhite"/>
<corners android:radius="15dp" />
</shape>
</item>
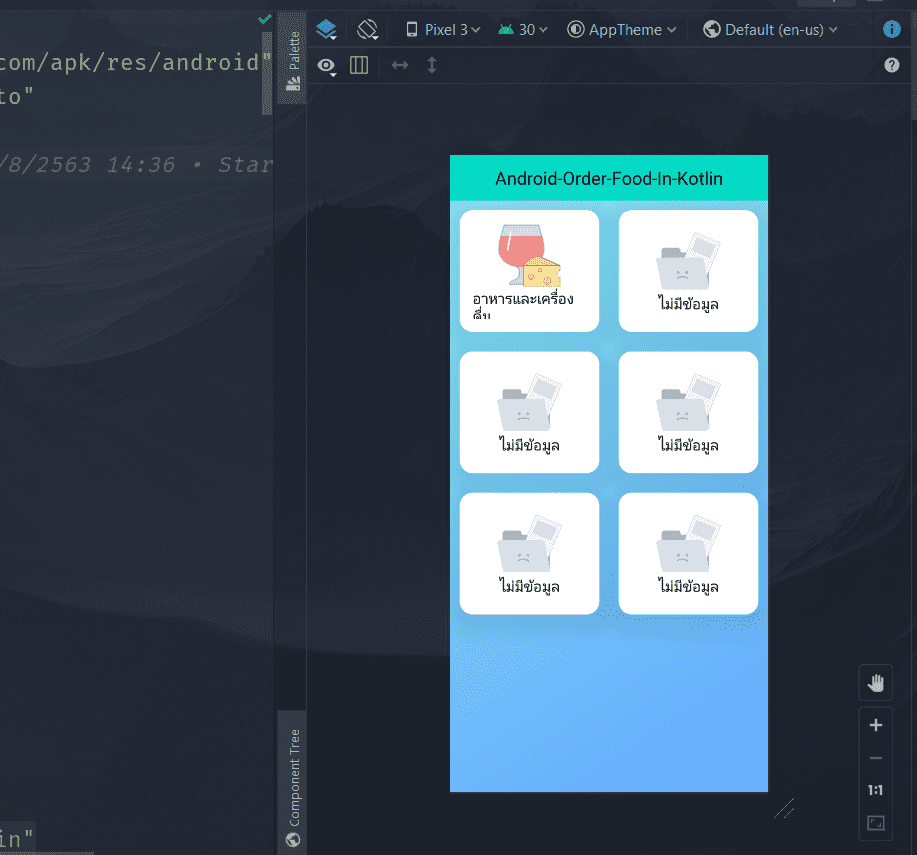
</selector>นี้ Code Layout หน้า Dashboard น่ะครับ
//activity_main.xml
<?xml version="1.0" encoding="utf-8"?>
<LinearLayout xmlns:android="http://schemas.android.com/apk/res/android"
    xmlns:app="http://schemas.android.com/apk/res-auto"
    xmlns:tools="http://schemas.android.com/tools"
    android:layout_width="match_parent"
    android:layout_height="match_parent"
    android:background="@drawable/asset1xxxhdpi"
    android:orientation="vertical"
    tools:context=".ui.MainActivity">

    <androidx.appcompat.widget.Toolbar
        android:layout_width="match_parent"
        android:layout_height="wrap_content"
        android:background="?attr/colorPrimary"
        android:minHeight="?attr/actionBarSize"
        android:theme="?attr/actionBarTheme">

        <TextView
            android:layout_width="wrap_content"
            android:layout_height="wrap_content"
            android:layout_gravity="center"
            android:maxLines="1"
            android:text="@string/app_name"
            android:textColor="@color/colorBlack"
            android:textSize="22sp" />

    </androidx.appcompat.widget.Toolbar>

    <androidx.gridlayout.widget.GridLayout
        android:id="@+id/my_grid"
        android:layout_width="match_parent"
        android:layout_height="match_parent"
        app:alignmentMode="alignMargins"
        app:columnCount="2"
        app:rowCount="4">

        <androidx.cardview.widget.CardView
            android:id="@+id/food_and_drink"
            android:layout_width="150dp"
            android:layout_height="150dp"
            android:layout_margin="12dp"
            app:cardCornerRadius="16dp"
            app:cardElevation="6dp"
            app:layout_columnWeight="1">

            <LinearLayout
                android:layout_width="match_parent"
                android:layout_height="match_parent"
                android:layout_gravity="center"
                android:background="@drawable/btn_bg"
                android:gravity="center"
                android:orientation="vertical"
                android:padding="16dp"
                tools:ignore="UseCompoundDrawables">

                <ImageView
                    android:layout_width="80dp"
                    android:layout_height="80dp"
                    android:contentDescription="@string/todo"
                    android:src="@drawable/icons8_food_and_wine_80" />

                <TextView
                    android:layout_width="wrap_content"
                    android:layout_height="wrap_content"
                    android:text="@string/food_and_drink"
                    android:textColor="@color/colorBlack"
                    android:textSize="18sp" />
            </LinearLayout>
        </androidx.cardview.widget.CardView>

        <androidx.cardview.widget.CardView
            android:layout_width="150dp"
            android:layout_height="150dp"
            android:layout_margin="12dp"
            app:cardCornerRadius="16dp"
            app:cardElevation="6dp"
            app:layout_columnWeight="1">

            <LinearLayout
                android:layout_width="match_parent"
                android:layout_height="150dp"
                android:layout_gravity="center"
                android:background="@drawable/btn_bg"
                android:gravity="center"
                android:orientation="vertical"
                android:padding="16dp"
                tools:ignore="UseCompoundDrawables">

                <ImageView
                    android:layout_width="80dp"
                    android:layout_height="80dp"
                    android:contentDescription="@string/todo"
                    android:src="@drawable/empty" />

                <TextView
                    android:layout_width="wrap_content"
                    android:layout_height="wrap_content"
                    android:text="@string/no_data"
                    android:textColor="@color/colorBlack"
                    android:textSize="18sp" />
            </LinearLayout>
        </androidx.cardview.widget.CardView>
    </androidx.gridlayout.widget.GridLayout>
</LinearLayout>
เราจะประกาศ id CardView อาหารและเครื่องดื่ม ว่า android:id=”@+id/food_and_drink” เพื่อเรียกใช้งาน ในการคลิกไปหน้ารายการอาหารและเครื่องดื่ม
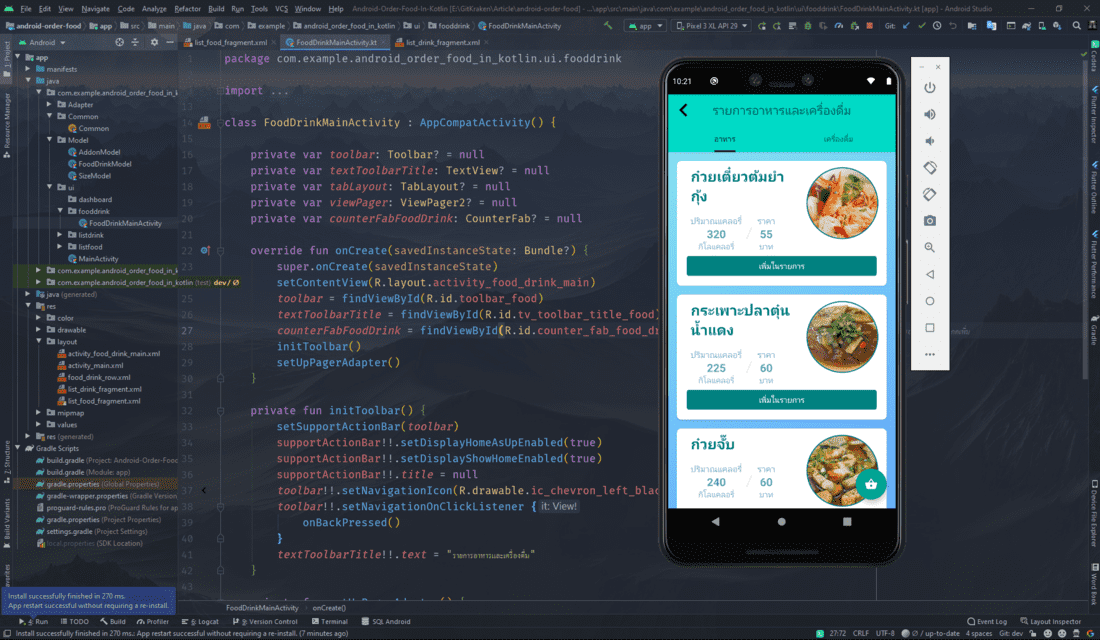
นี้ คือ หน้า Layout ที่เราได้
อย่าลืมไปสร้างหน้า รายการอาหารและเครื่องดื่ม สำหรับลิงค์ไปหน้ารายการอาหารและเครื่องดื่ม
โดยขั้นตอนสร้าง Activity นั้นคือ
- คลิก ที่ File
- คลิก ที่ New
- คลิก ที่ Activity
- คลิก ที่ Empty Activity
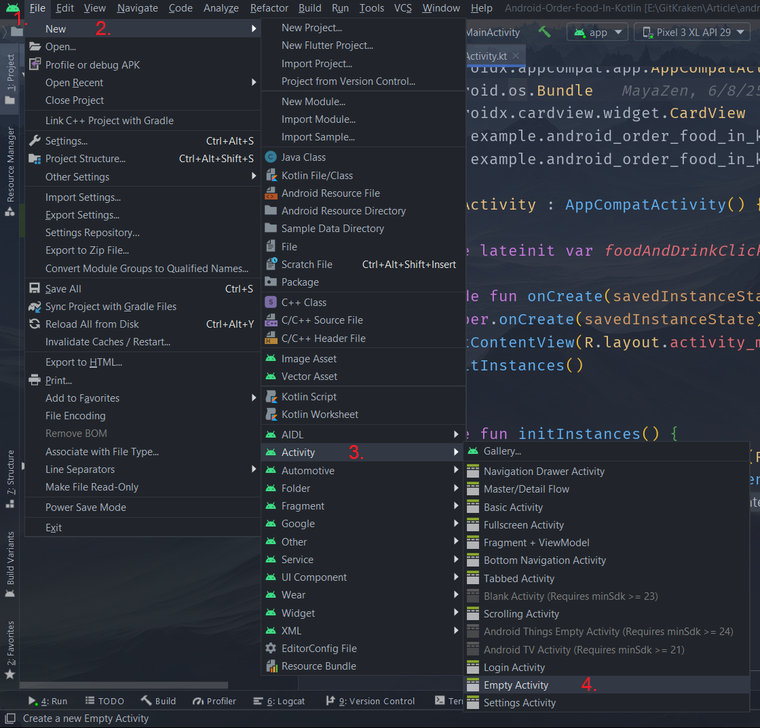
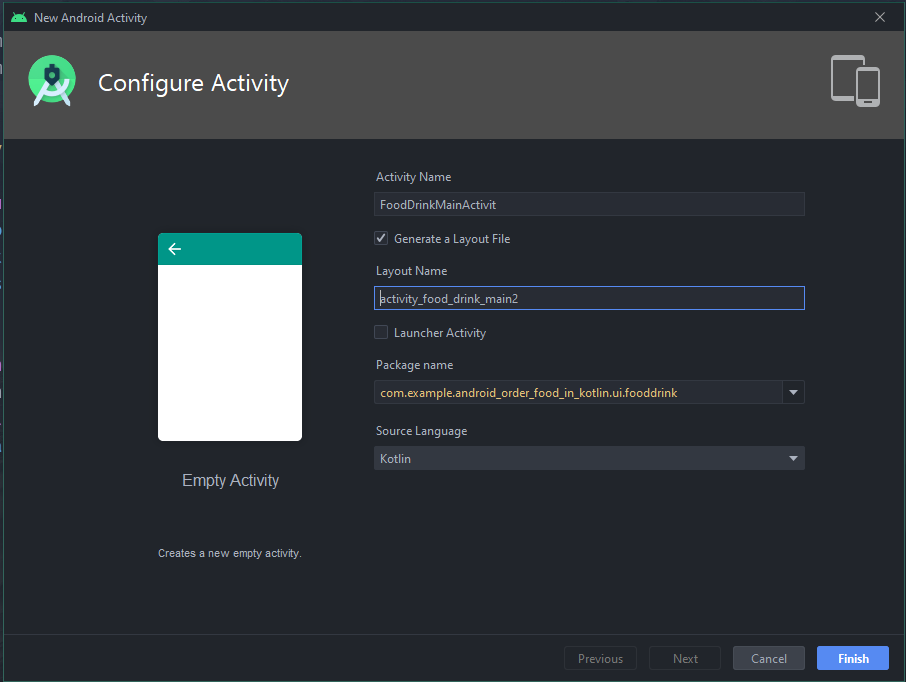
เมื่อคลิก Empty Activity จะขื้นหน้า New Android Activity ให้ใส่ชื่อ Activity Name
เมื่อสร้างเสร็จแล้ว เรามาทำฟังก์ชั่น ลิงค์ไปหน้ารายการอาหารและเครื่องดื่มกัน
โดยเราจะใช้ id ประกาศไว้ในหน้า activity_main.xml คือ food_and_drink
kotlin นั้นสามารถเชื่อมต่อ view กับ code ได้เลย โดยไม่ต้องประกาศ findViewById(R.id.food_and_drink) เหมือนกับ Java เพราะ kotlin ใช้ kotlinx.android.synthetic ในการเชื่อมต่อ view กับ code
ประกาศต่อ .setOnClickListener{} เมื่อคลิกที่ CardView
food_and_drink.setOnClickListener {
           ....
}
จากนั้นเพิ่มโค๊ด สองบรรทัดนี้ลงไป ใน setOnClickListener
val intent = Intent(this, FoodDrinkMainActivity::class.java)
startActivity(intent)
โค๊ด สองบรรทัดนี้ คือ เราจะสร้างออปเจ็ค intent ขึ้นมา โดยจะรับ parameter 2 ตัว ตัวแรก คือ Context ภายใน Activity แรก และ parameter ตัวที่สองคือ Activity ที่เราต้องการเปิด
อันนี้ Code ตัวเต็ม
//MainActivity.kt
import android.content.Intent
import androidx.appcompat.app.AppCompatActivity
import android.os.Bundle
import com.example.android_order_food_in_kotlin.R
import com.example.android_order_food_in_kotlin.ui.fooddrink.FoodDrinkMainActivity
import kotlinx.android.synthetic.main.activity_main.*

class MainActivity : AppCompatActivity() {

    override fun onCreate(savedInstanceState: Bundle?) {
        super.onCreate(savedInstanceState)
        setContentView(R.layout.activity_main)
        initInstances()
    }

    private fun initInstances() {
        food_and_drink.setOnClickListener{
            val intent = Intent(this, FoodDrinkMainActivity::class.java)
            startActivity(intent)
        }
    }
}
เรามาทำหน้ารายการอาหารและเครื่องดื่มกันต่อ
//activity_food_drink_main.xml
<?xml version="1.0" encoding="utf-8"?>
<androidx.coordinatorlayout.widget.CoordinatorLayout
    xmlns:android="http://schemas.android.com/apk/res/android"
    xmlns:app="http://schemas.android.com/apk/res-auto"
    android:id="@+id/food_drink_activity"
    android:layout_width="match_parent"
    android:layout_height="match_parent"
    android:background="@drawable/asset1xxxhdpi">

    <com.google.android.material.appbar.AppBarLayout
        android:id="@+id/appbar"
        android:layout_height="wrap_content"
        android:layout_width="match_parent">

        <androidx.appcompat.widget.Toolbar
            android:id="@+id/toolbar_food"
            android:layout_width="match_parent"
            android:layout_height="wrap_content"
            android:background="?attr/colorPrimary"
            android:minHeight="?attr/actionBarSize"
            android:theme="?attr/actionBarTheme">

            <TextView
                android:id="@+id/tv_toolbar_title_food"
                android:layout_width="wrap_content"
                android:layout_height="wrap_content"
                android:layout_gravity="center"
                android:gravity="center"
                android:maxLines="1"
                android:textColor="@color/colorDarkGreen"
                android:textSize="22sp" />

        </androidx.appcompat.widget.Toolbar>

        <com.google.android.material.tabs.TabLayout
            android:id="@+id/tab_layout_food_drink"
            android:layout_width="match_parent"
            android:layout_height="wrap_content"
            android:background="?attr/colorPrimary"
            android:minHeight="?attr/actionBarSize"
            android:theme="?attr/actionBarTheme"
            app:tabGravity="fill"
            app:tabIndicatorColor="@android:color/black"
            app:tabIndicatorFullWidth="false"
            app:tabIndicatorHeight="3dp"
            app:tabMode="fixed"
            app:tabPaddingEnd="20dp"
            app:tabPaddingStart="20dp"
            app:tabSelectedTextColor="@android:color/black"
            app:tabTextColor="@color/colorDarkGreen"/>
    </com.google.android.material.appbar.AppBarLayout>

    <androidx.core.widget.NestedScrollView
        android:layout_width="match_parent"
        android:layout_height="match_parent"
        app:layout_behavior="com.google.android.material.appbar.AppBarLayout$ScrollingViewBehavior">

        <androidx.viewpager2.widget.ViewPager2
            android:id="@+id/view_pager_food_drink"
            android:layout_width="match_parent"
            android:layout_height="match_parent"
            android:orientation="horizontal" />
    </androidx.core.widget.NestedScrollView>

    <com.andremion.counterfab.CounterFab
        android:id="@+id/counter_fab_food_drink"
        android:layout_width="wrap_content"
        android:layout_height="wrap_content"
        android:layout_alignParentEnd="true"
        android:layout_alignParentRight="true"
        android:layout_alignParentBottom="true"
        android:layout_gravity="bottom|end"
        android:layout_margin="16dp"
        android:padding="10dp"
        android:src="@drawable/ic_shopping_basket_black_24dp"
        android:tint="@color/colorWhite"
        app:badgeBackgroundColor="@color/colorRed" />
</androidx.coordinatorlayout.widget.CoordinatorLayout>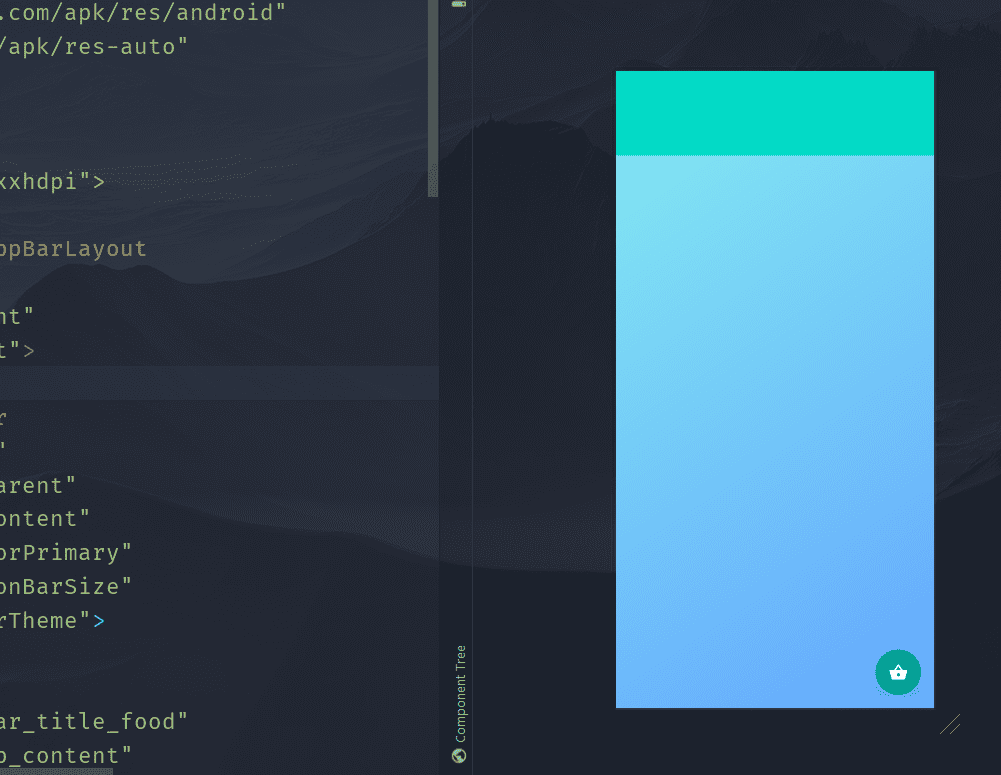
ก่อนจะไปสร้าง Adapter เราจะมาสร้างหน้า ListFoodFragment และ หน้า ListDrinkFragment กันก่อน
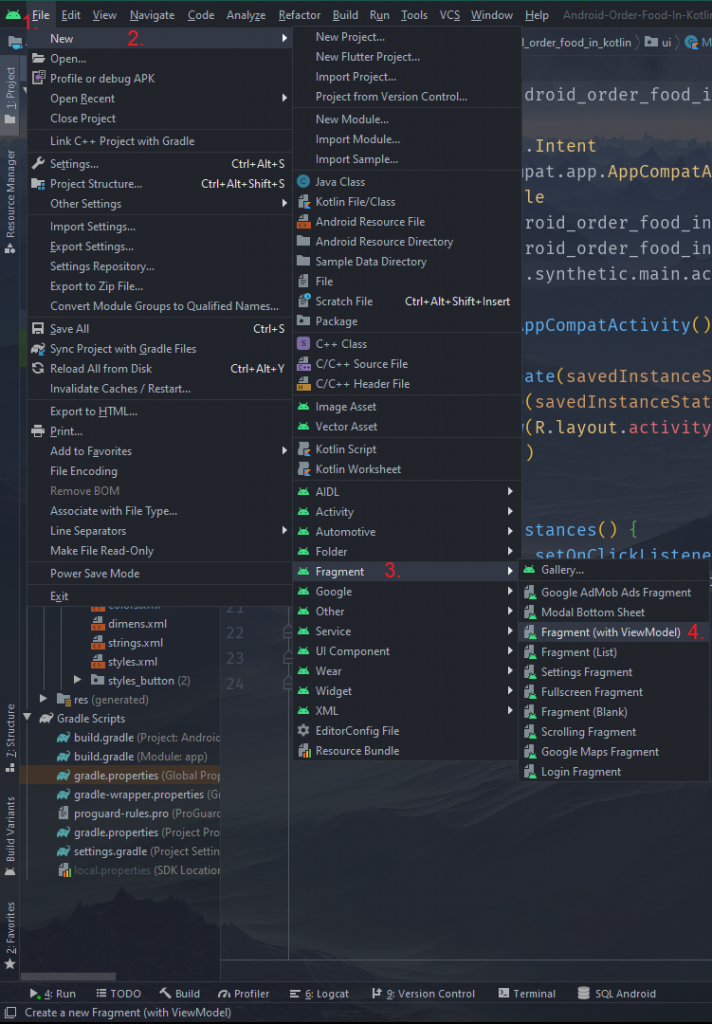
ขั้นตอนการสร้าง Fragment
- คลิกที่ File
- คลิกที่ New
- คลิกที่ Fragment
- คลิกที่ Fragment(with ViewModel)
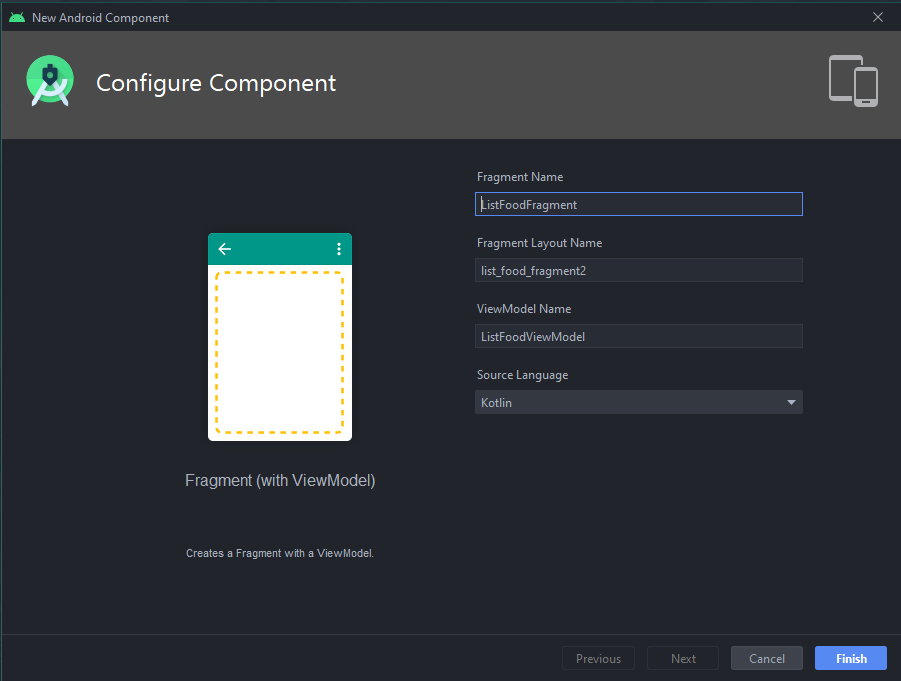
เมื่อคลิก Fragment(with ViewModel) จะขื้นหน้า New Android Component ให้ใส่ชื่อ Fragment Name
เมื่อสร้างเสร็จแล้ว เราจะมาสร้าง Adapter กัน โดยโปรเจคนี้ เราจะใช้ ViewPager2
ViewPager2 คืออะไร ทำงานอย่างไง สามารถอ่านที่นี้ได้เลยครับ URL: https://akexorcist.dev/view-pager-will-be-replace-with-view-pager-2/
//FoodDrinkPagerAdapter.kt
import androidx.fragment.app.Fragment
import androidx.fragment.app.FragmentManager
import androidx.lifecycle.Lifecycle
import androidx.viewpager2.adapter.FragmentStateAdapter
import com.example.android_order_food_in_kotlin.ui.listdrink.ListDrinkFragment
import com.example.android_order_food_in_kotlin.ui.listfood.ListFoodFragment

class FoodDrinkPagerAdapter(fragmentManager: FragmentManager, lifecycle: Lifecycle) :
    FragmentStateAdapter(fragmentManager, lifecycle) {

    override fun getItemCount(): Int = 2

    override fun createFragment(position: Int): Fragment {
        return if (position == 0) {
            ListFoodFragment.newInstance()
        } else ListDrinkFragment.newInstance()
    }
}
เมื่อเราสร้างหน้า Adapter เสร็จ เราจะเอา FoodDrinkPagerAdapter ต่อกับ FoodDrinkMainActivity.kt กัน
เรามาสร้าง Toolbar ใน FoodDrinkMainActivity.kt กันก่อน
        setSupportActionBar(toolbar_food)
        supportActionBar!!.setDisplayHomeAsUpEnabled(true)
        supportActionBar!!.setDisplayShowHomeEnabled(true)
        supportActionBar!!.title = null
        toolbar_food.setNavigationIcon(R.drawable.ic_chevron_left_black_48dp)
        toolbar_food.setNavigationOnClickListener {
            onBackPressed()
        }
        tv_toolbar_title_food.text = "รายการอาหารและเครื่องดื่ม"
เมื่อสร้าง Toolbar เสร็จแล้วเราทำ Adapter ต่อกับ FoodDrinkMainActivity.kt กัน
private fun setUpPagerAdapter() {
        val adapter = FoodDrinkPagerAdapter(supportFragmentManager, lifecycle)
        view_pager_food_drink.adapter = adapter

        TabLayoutMediator(tab_layout_food_drink, view_pager_food_drink,
            TabLayoutMediator.TabConfigurationStrategy { tab, position ->
                when (position) {
                    0 -> {
                        tab.text = "อาหาร"
                    }
                    1 -> {
                        tab.text = "เครื่องดื่ม"
                    }
                }
            }).attach()
    }
view_pager_food_drink , tab_layout_food_drink คือ id ประกาศไว้ใน activity_food_drink_main.xml
อันนี้คือ โค้ดทั้งหมดครับ
//FoodDrinkMainActivity.kt
import androidx.appcompat.app.AppCompatActivity
import android.os.Bundle
import com.example.android_order_food_in_kotlin.R
import com.example.android_order_food_in_kotlin.Adapter.FoodDrinkPagerAdapter
import com.google.android.material.tabs.TabLayoutMediator
import kotlinx.android.synthetic.main.activity_food_drink_main.*

class FoodDrinkMainActivity : AppCompatActivity() {

    override fun onCreate(savedInstanceState: Bundle?) {
        super.onCreate(savedInstanceState)
        setContentView(R.layout.activity_food_drink_main)
        initToolbar()
        setUpPagerAdapter()
    }

    private fun initToolbar() {
        setSupportActionBar(toolbar_food)
        supportActionBar!!.setDisplayHomeAsUpEnabled(true)
        supportActionBar!!.setDisplayShowHomeEnabled(true)
        supportActionBar!!.title = null
        toolbar_food.setNavigationIcon(R.drawable.ic_chevron_left_black_48dp)
        toolbar_food.setNavigationOnClickListener {
            onBackPressed()
        }
        tv_toolbar_title_food.text = "รายการอาหารและเครื่องดื่ม"
    }

    private fun setUpPagerAdapter() {
        val adapter = FoodDrinkPagerAdapter(supportFragmentManager, lifecycle)
        view_pager_food_drink.adapter = adapter

        TabLayoutMediator(tab_layout_food_drink, view_pager_food_drink,
            TabLayoutMediator.TabConfigurationStrategy { tab, position ->
                when (position) {
                    0 -> {
                        tab.text = "อาหาร"
                    }
                    1 -> {
                        tab.text = "เครื่องดื่ม"
                    }
                }
            }).attach()
    }
}
เพิ่มโค้ด ที่ styles.xml ใน values
อันนี้ คือ โค้ด Layout Design ที่จะเอาไปใช้กับ Button add to list กับ Button added ที่ใช้ในหน้า food_drink_row.xml
//styles.xml
<?xml version="1.0" encoding="utf-8"?>
<resources>
    <style name="FoodDrinkButton">
        <item name="android:stateListAnimator">@null</item>
        <item name="android:textSize">@dimen/text_body_2</item>
    </style>

    <style name="FoodDrinkButton.Active">
        <item name="android:background">@drawable/btn_active_selector</item>
        <item name="android:textColor">@color/colorWhite</item>
    </style>

    <style name="FoodDrinkButton.Active.Boarder">
        <item name="android:background">@drawable/btn_active_border_selector</item>
        <item name="android:paddingEnd">@dimen/default_padding_margin_large</item>
        <item name="android:paddingStart">@dimen/default_padding_margin_large</item>
        <item name="android:textColor">@color/btn_inactive_text_color_selector</item>
    </style>
</resources>
สร้าง food_drink_row.xml ที่ layout
food_drink_row คือ รูปแบบที่เราจะนำข้อมูลมาแสดง
//food_drink_row.xml
<?xml version="1.0" encoding="utf-8"?>
<androidx.cardview.widget.CardView xmlns:android="http://schemas.android.com/apk/res/android"
    xmlns:app="http://schemas.android.com/apk/res-auto"
    xmlns:tools="http://schemas.android.com/tools"
    android:id="@+id/card_view_food_drink"
    android:layout_width="match_parent"
    android:layout_height="wrap_content"
    android:layout_marginStart="16dp"
    android:layout_marginTop="16dp"
    android:layout_marginEnd="16dp"
    app:cardCornerRadius="8dp"
    tools:ignore="RtlSymmetry">

    <LinearLayout
        android:layout_width="match_parent"
        android:layout_height="wrap_content"
        android:orientation="vertical"
        android:padding="10dp">

        <LinearLayout
            android:layout_width="match_parent"
            android:layout_height="wrap_content"
            android:baselineAligned="false"
            android:orientation="horizontal">

            <LinearLayout
                android:layout_width="0dp"
                android:layout_height="wrap_content"
                android:layout_weight="1"
                android:orientation="vertical"
                android:paddingStart="15dp"
                android:paddingLeft="15dp">

                <TextView
                    android:id="@+id/tvName"
                    android:layout_width="wrap_content"
                    android:layout_height="wrap_content"
                    android:text="@string/no_data"
                    android:textColor="@color/colorTeal"
                    android:textSize="26sp"
                    android:textStyle="bold" />

                <LinearLayout
                    android:layout_width="wrap_content"
                    android:layout_height="wrap_content"
                    android:layout_marginTop="18dp"
                    android:orientation="horizontal">

                    <LinearLayout
                        android:layout_width="wrap_content"
                        android:layout_height="wrap_content"
                        android:orientation="vertical">

                        <TextView
                            android:layout_width="wrap_content"
                            android:layout_height="wrap_content"
                            android:layout_gravity="center"
                            android:text="@string/calorie_content"
                            android:textColor="#DF6A90B5"
                            android:textSize="15sp" />

                        <TextView
                            android:id="@+id/tvCal"
                            android:layout_width="wrap_content"
                            android:layout_height="wrap_content"
                            android:layout_gravity="center"
                            android:text="@string/no_data_cal"
                            android:textColor="#6A90B5"
                            android:textSize="20sp"
                            android:textStyle="bold" />

                        <TextView
                            android:layout_width="wrap_content"
                            android:layout_height="wrap_content"
                            android:layout_gravity="center"
                            android:text="@string/kilo_calories"
                            android:textColor="#DF6A90B5"
                            android:textSize="14sp" />

                    </LinearLayout>

                    <ImageView
                        android:layout_width="10dp"
                        android:layout_height="match_parent"
                        android:layout_marginStart="8dp"
                        android:layout_marginLeft="8dp"
                        android:contentDescription="@string/todo"
                        android:src="@drawable/split" />

                    <LinearLayout
                        android:layout_width="wrap_content"
                        android:layout_height="wrap_content"
                        android:layout_marginStart="10dp"
                        android:layout_marginLeft="10dp"
                        android:orientation="vertical">

                        <TextView
                            android:layout_width="wrap_content"
                            android:layout_height="wrap_content"
                            android:layout_gravity="center"
                            android:text="@string/price"
                            android:textColor="#EE6A90B5"
                            android:textSize="15sp" />

                        <TextView
                            android:id="@+id/tvPrice"
                            android:layout_width="wrap_content"
                            android:layout_height="wrap_content"
                            android:layout_gravity="center"
                            android:text="@string/no_data_cal"
                            android:textColor="#6A90B5"
                            android:textSize="20sp"
                            android:textStyle="bold" />

                        <TextView
                            android:layout_width="wrap_content"
                            android:layout_height="wrap_content"
                            android:layout_gravity="center"
                            android:text="@string/baht"
                            android:textColor="#EE6A90B5"
                            android:textSize="14sp" />

                    </LinearLayout>

                </LinearLayout>

            </LinearLayout>

            <RelativeLayout
                android:layout_width="wrap_content"
                android:layout_height="133dp"
                android:gravity="center">

                <de.hdodenhof.circleimageview.CircleImageView
                    android:id="@+id/imageView"
                    android:layout_width="140dp"
                    android:layout_height="130dp"
                    android:layout_alignParentStart="true"
                    android:layout_alignParentLeft="true"
                    android:layout_marginStart="10dp"
                    android:layout_marginLeft="10dp"
                    android:src="@drawable/empty"
                    app:civ_border_color="@color/colorTeal"
                    app:civ_border_width="2dp" />
            </RelativeLayout>
        </LinearLayout>

        <Button
            android:id="@+id/btn_add_to_list"
            style="@style/FoodDrinkButton.Active"
            android:layout_width="match_parent"
            android:layout_height="36dp"
            android:layout_margin="8dp"
            android:text="@string/add_to_list" />

        <Button
            android:id="@+id/btn_added"
            style="@style/FoodDrinkButton.Active.Boarder"
            android:layout_width="match_parent"
            android:layout_height="36dp"
            android:layout_margin="8dp"
            android:text="@string/added"
            android:visibility="gone"
            tools:visibility="visible" />
    </LinearLayout>
</androidx.cardview.widget.CardView>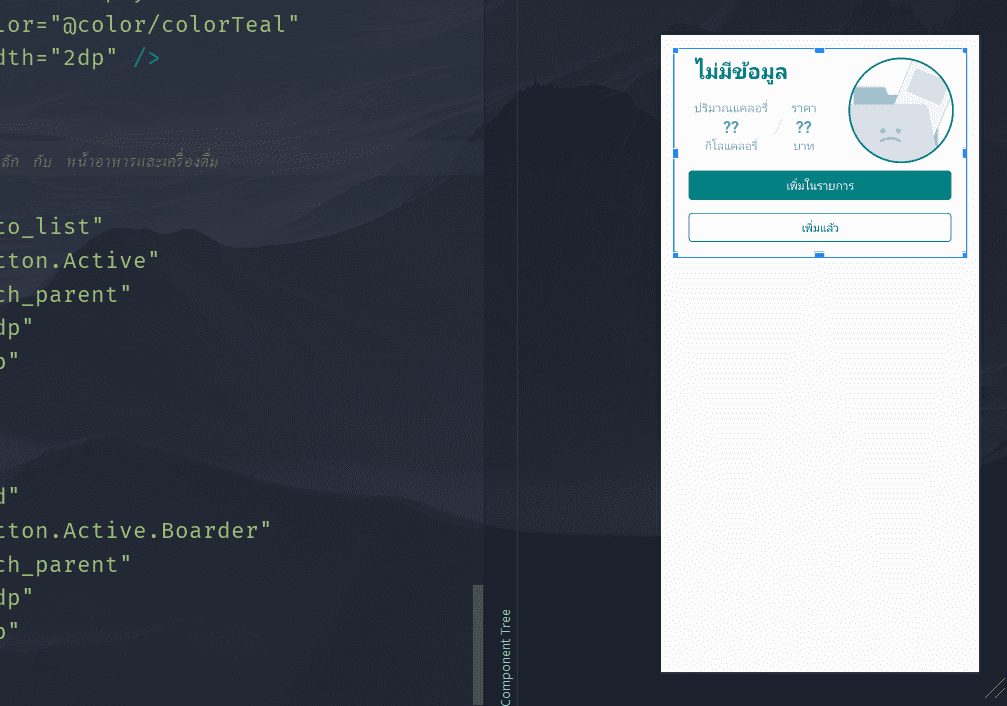
หน้าอาหาร และ หน้าเครื่องดื่ม เราจะใช้ RecyclerView ในการแสดงข้อมูล ที่เราดึงมาจาก Cloud Firestore
//list_food_fragment.xml
<?xml version="1.0" encoding="utf-8"?>
<LinearLayout
    xmlns:android="http://schemas.android.com/apk/res/android"
    xmlns:tools="http://schemas.android.com/tools"
    android:layout_width="match_parent"
    android:layout_height="match_parent"
    android:orientation="vertical"
    tools:context=".ui.listfood.ListFoodFragment">

    <androidx.recyclerview.widget.RecyclerView
        android:id="@+id/recycler_food_list"
        android:paddingBottom="10dp"
        android:layout_width="match_parent"
        android:layout_height="match_parent"
        tools:listitem="@layout/food_drink_row" />

</LinearLayout>
//list_drink_fragment.xml
<?xml version="1.0" encoding="utf-8"?>
<LinearLayout xmlns:android="http://schemas.android.com/apk/res/android"
xmlns:tools="http://schemas.android.com/tools"
android:layout_width="match_parent"
android:layout_height="match_parent"
android:orientation="vertical"
tools:context=".ui.listdrink.ListDrinkFragment">
<androidx.recyclerview.widget.RecyclerView
android:id="@+id/recycler_drink_list"
android:paddingBottom="10dp"
android:layout_width="match_parent"
android:layout_height="match_parent"
tools:listitem="@layout/food_drink_row"/>
</LinearLayout>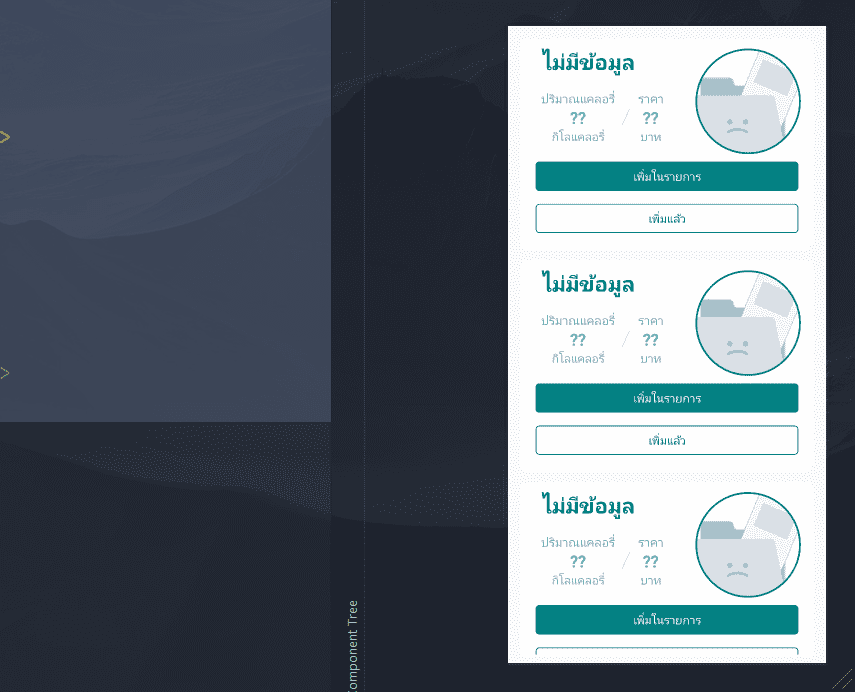
ตอนนี้เราได้หน้า Dashboard กับ หน้ารายการอาหารแล้ว แต่ยังไม่มีข้อมูลที่จะนำมาแสดง ในตอนหน้าเราสร้างข้อมูลกัน พร้อมกับติดตั้ง Firebase สร้าง Cloud Firestore กับวิธีเพิ่มข้อมูลลงใน Cloud Firestore โดยผ่านแอป ส่วนรูปภาพ เราเก็บใน Cloud Storage for Firebase กันนะครับ
หรือใครเริ่มท้อ คิดว่ามันยากเกินไป จะมาปรึกษา หรือ จ้างเราทำก็ได้นะ ราคาคุยกันได้
Twinsynergy #ออกและพัฒนาเว็บไซต์ #ทำเว็บไซต์และแอปพลิเคชั่น #พัฒนาซอฟแวร์ #Website #MobileApplication #Dev #WebDesign
📌สนใจติดต่อ📌
💻 twinsynergy.co.th
📱 063-789-9059